Who wouldn’t love a 3 in 1 gift? This is a fun Nesting/Stacking trio of boxes. 
I think my favorite part of this project is the card. I just love the look of the quilling on the strawberries.


Who wouldn’t love a 3 in 1 gift? This is a fun Nesting/Stacking trio of boxes.
I think my favorite part of this project is the card. I just love the look of the quilling on the strawberries.
Well in my blogging absence I had two projects post on UStamp With Dawn and Friends!!. The live even is now over but you can still join and have access to all of the 50+ projects and ideas. My first project was centered around the little stamp set Merry Winter. I just love the little snowmen. I just love snowmen in general, probably because I grew up in sunny warm San Diego, the land of no snow (except Christmas Eve 1987, I was 8 and it snowed, but of course melted as soon as it hit the ground). I just cannot get enough snowmen. 


I am addicted to the candy wrapper die. I just love it. Ok I have to admit that when I first bought it and cut out the first few boxes I wanted to pull my hair out and run away screaming. I just could not get the folds right and the ends were bent and messy and the whole thing was just a mess. So I put it aside and didn’t think twice about it. After a few months of staring at my expensive dust collector I decided that I would tackle it again and this time I would be the one that came out on top! I figured out the best way for me to assemble the die (see the current session of UStamp With Dawn and Friends!! for a video tutorial.) Once I mastered the basic box I saw all of the potential these little cuties possessed.

I have some computer time and something to share. Boy this summer has been a chaotic one for me. I like being able to have everything planned out in advance and a set schedule but that is just not even coming close to happening. It has just been busy with all of the little things this summer and I have loved the time with the kiddos. But the good news is that school starts back in a week and a half and I am looking forward to some regular stamping time and a schedule.
Exciting Breaking News!! Dawn has opened up the current session of UStamp With Dawn and Friends!! a day early! 
And to top it off one of my projects was shared today so I can share it with you! It is a set of 10 Halloween Treat Boxes made from the Candy Wrapper Die.


To get all of the details to make the 10 boxes head over to www.ustampwithdawnandfriends.com to sign up!
Pin It Now!This is a fun class that makes a great to give to a man or even a class for men!
All of the cards and envelopes fit in a box and in the box is an Important Dates reminder card so that the “Attentive Man” can keep track of the important things (as long as he remembers to look!) 


While I was struggling with my computer, my second project was posted over on UStamp With Dawn and Friends!! Oh My Word edition. I used Stampin’ Up!’s beautiful Spring Time Vintage Designer Fabric to create some headbands. This would make such a great Mother Daughter class since headbands are so popular. Although they do involve a little sewing they are super easy. Just a few straight lines. 


Although the live events have been completed it is not too late to subscribe to the Oh My Word Edition on Ustamp With Dawn and Friends!! You can still access and down load all of the projects at http://ustampwithdawnandfriends.com.
Pin It Now!

My project that I created for UStamp went live today so I can finally share it with you. I am so happy with this box. I saw a box of chocolates it while shopping in the wee hours of the morning on Black Friday. I don't remember if it was Dove or Hershey bliss but it was a really cute fancy box. Someone had opened one to take a piece of candy out and it was cool looking. I checked it out while waiting in line and that was it until about a week and a half later I was asked to create for UStamp and I decided I wanted to make it. I went back to the store and of course could not find the box. I went home and spent hours trying to make it work based on my memory. Well I finally figured it out and got it working and I LOVE it! I did add my own spin on it to add in the window to see the yummy chocolate.


If you would like the directions for this box check out the “Year End Blow Out” session of UStamp with Dawn and Friends. http://ustampwithdawnandfriends.com/
Pin It Now!I cannot believe it has been a whole week since I have posted. Sorry, life just got in the way of my well made plans and I feel like I have been doing alot of apologizing. With busy schedules and typical seasonal illness, I just do not have enough time in the day anymore. I do have a few things to show you and hope to get a few extra posts scheduled to go out in the upcoming days to prevent this lack of blogging. Anyways here is this weeks color challenge.
It was another beautiful fall color combination. Last week I had my little class. I love this little class of mine it really keeps me going. We made some top note boxes. I just absolutely love the top note die by Stampin’ Up! It has been used for so many different things. I cased all 4 boxes but as I was teaching the ladies I knew I had to come up with one of my own. I knew I needed an Indian to go with the set. This color combo was perfect for it! It is a super simple easy to duplicate little Indian.
Don’t forget to check out the Diva Coffee Break Design Blog here to check out what the other diva’s have made and to play along too. You too can be featured on the blog! Come back tomorrow to see the other two boxes in my set.
Ink: Creamy Caramel ink pad and marker
Paper: Creamy Caramel. Always Artichoke, Ruby Red, Bravo Burgundy, Whisper White, Basic Black
Accessories: Dimensionals
Tools: Big Shot, Top Note Die, Perfect Details Texture Plate, 1 inch circle punch, 3/4 inch circle punch, 1/2 inch circle punch, Round tab punch, Large Oval punch
Pin It Now!There is a wonderful video tutorial for demonstrators on the Stampin’ Up! website that shows how to make a couple of different boxes. (Now is the perfect time to sign up to be a demo with the special starter kit for only $85 just ask me how!) I love this cute “twist box”. It was so much fun to make so I made two of them. I gave away the first one right after I made it, minutes later. I stuffed it with some candy that I had around the house.


Paper: Tall Tales DSP, Chocolate Chip Textured Cardstock, Whisper White and Rose Red
Accessories: Stampin Dimensionals, Sticky Strip
Tools: Big Shot, Matchbox Bigz XL die, Many Thanks Sizzlits Die
Pin It Now!Here are some quick gifts that I made up for some door prizes. They can be used for just about anything all you have to do is change the sentiment or add something different inside.
Each little box has a pack of Orbit gum, an incentive stamp and a spot. Super easy and so cute.
Stamps: Say it With Scallops
Ink: Summer Sun , Chocolate Chip, Pacific Point, Certainly Celery
Paper: Good Morning Sunshine DSP, Whisper White, Simmer Sun, Certainly Celery
Accessories: Stampin Dimensionals
Tools: Big Shot and Box #2 die, Scallop Square Punch
Pin It Now!I am so sorry for disappearing the last week or so. Just when I seem to get a grip on life and into a good schedule and routine something happens to throw it all out of whack. Well we are starting to get back on track so I can pay attention again to things like my stamping and my blog.
I was agonizing for a while trying to come up with a card holder for the little set of 3x3 Upsy Daisy cards that I had done. I was able to come up with a cute fun holder by altering the box in a bag to fit! Here is the set of cards that I was working on:

Supplies for the card holder:
Stamps: Upsy Daisy
Ink: Versamark, Regal Rose, and Bordering Blue
Paper: Regal Rose , Rose Red, So Saffron, and Whisper White
Accessories: Regal Rose Wide Grosgrain, Apricot Appeal Grosgrain, Fire Circle Rhinestones, Stampin Dimensionals, Clear Embossing Powder
Tools: Round Tab Punch, Scallop Edge Punch, Crop a Dile, Heat Tool and sponge
Pin It Now!So I still haven’t found the charger for my camera, lil stinker, so I figured out how to use my webcam to take a picture. This was my first time using it for pictures and since it doesn’t have a flash and it is raining today, it was hard to get a good picture but I think I did ok. It was a crazy sight, I had all of the small lamps from around the house on my desk some pointed at two mirrors to reflect light and others to actually light the project. Anyways, I have found a way to do pictures in the time being.
This is the project I did for my little mini class. It is a Valentine’s Box. Here is a picture of the box with the lid and without. I got the pattern for the box from Becky Robert’s Blog “Inking Idaho”. I did change up the compartments a little to make the box work for what I was putting in it, but her instructions were great.

In the box we made several cupcake tags, that can be attached as gift. This idea was also from Becky. Although you cannot really tell from the picture the cherry is covered with crystal effects to give it that shiny maraschino cherry look.
This is one of the cards in the box. The flower on the love you much image is covered by a pink pirouette felt flower but it doesn't really show up in the picture.

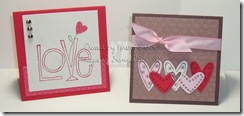
We also made several love notes and here are two of the designs. The one on the left is inspired by the one on the Stampin’ Up! home page, I just made it into a smaller card. The one on the right is from Dannie Graves, I just changed the card color and a little bit of the dsp dimensions.
Then in the end there was a little extra room so I filled it up with some dark chocolate raspberry kisses.
Stamps: Love You Much, Simple Birthday Thanks
Ink: Real Red, Riding Hood Red, Chocolate Chip, Pretty in Pink, Pink Pirouette, Baja Breeze, Basic Black and Many Marvelous Markers set
Paper: Real Read, Riding Hood Red, Chocolate Chip, Pretty in Pink, Pink Pirouette, Whisper White, Candy Lane DSP Summer Picnic DSP and Riding Hood Red Patterns DSP
Accessories: Crystal Effects, Antique Brass Jumbo Eyelets, Signo White Gel Pen. Chocolate Satin Ribbon, Stampin’ Dimensionals, Flower Fusion Too, Real Red Brad, Aqua Painter, Pretty in Pink Tafetta Ribbon, Silver Brads
Tools: Crafter’s Tool Kit, Heart to Heart Punch, Scallop Edge Punch, Scallop Edge Punch
Pin It Now!