Pages

Monday, September 29, 2008

Turkeys Already!

I have some ladies coming over for a class this week and we are going to work on some Thanksgiving and Autumn/Fall projects.  I found this cute little turkey in the October Stampin' Success magazine (available only to demo's)  and knew that I would have to make them.  He is really quite simple to make, the hardest part was getting everything attached together and to the card front.

SU! Turkey

The card base is made using the Top Notes Big Shot die.  I just love it!  The turkey feathers are made from folding the scallop circle punch images.  When I do this for the class we are just going to draw in the eyes, in this sample I used the double circle punch but those were the pits to get on there and since it was hard for me I am not going to make others try and do it.

Stamps: Holidays and Wishes

Ink: Chocolate Chip

Paper:  Very Vanilla, Ruby Red, Pumpkin Pie, Old Olive, Chocolate Chip, Basic Black, More Mustard

Accessories:  Stampin' Dimensionals, Chocolate Chip Satin Ribbon

Tools/ Punches:  1 3/8 inch Circle Punch, 3/4 Inch Circle Punch, 3/4 Inch Square Punch, Scallop Circle Punch, Boho Blossoms Punch, 1/4 Inch Circle Punch, Double Circle Punch

Pin It Now!

Friday, September 26, 2008

Fantastic First Grader Goodie Bags

So after my prototype box was altered by Hannah, I forgot about getting back to these projects until about 9:15 tonight.  So I was in a big hurry and had to come up with something fast and cute.  Today I finally got my Top Note Die that was on backorder so I decided to use that for a bag topper.  I have seen it used several times as an owl and the most recent one I saw was from Beth Redding.  These guys were so easy and relatively fast to put together.  So in the goody bags I made a bookmark out of a one sheet wonder, included a pencil, erasers and pencil sharpener.   They turned out great for only 1.5 hours of work (I can easily do that on one card at times.)

So here is the group shot of all 20 little baggies...

All Owls

Here is what each individual bag looks like....

Owl

And here is a sample of one of the bookmarks...

bookmark

I hope that the kids think that they are fun.

Stamps: Wild about You

Ink:  Bordering Blue, More Mustard, Old Olive, Not Quite Navy

Paper:  Whisper White, Basic Black, Close To Cocoa, Chocolate Chip, Only Orange, Non Stampin' Up! Blue ( GASP, I know, but I had a lot of cardstock from my pre-SU! days and it is heavier than SU! so I figured they might last a little longer this way after all they are 6-7 year olds.)

Accessories:  Blue Yarn

Punches/ Tools: Crop-a-dile, 1/4 Inch Circle Punch, 1/2 Inch Circle Punch, 1 Inch Circle Punch, Small Oval Punch

Pin It Now!

Wednesday, September 24, 2008

Oh where oh where did my mojo go?

Oh where oh where can it be? With its stamps uninked and its paper uncut, oh where oh where can it be? So I have been singing this to myself all night long (to the tune of Oh Where oh where has my little dog gone, I know I have been around my kids too long) as I have tried to come up with something. I have a Christmas card swap that I need to figure out, and a class next Wed with no projects planned and I cannot come up with anything. I have even tried to get up and do other little tasks for a few minutes at a time to try and get and "aha" moment but still nothing. I did decide on one project for my Thanksgiving themed class, and that is the globe pumpkin. So I whipped one out, I think it needs a little something more so the next one I do will have to try adding some leaves on it. So when I went to go into Photoshop it would not open and kept telling me that there were some unrecoverable errors. I guess I really was not meant to get anything posted tonight, but nope by this time I was bound and determined so I opened up my old software (free downloads) and found a watermark image that would work with the program and viola, here is what I did tonight.
The more I see this, the more I want to find some awesome way to jazz it up, but that will have to wait until tomorrow at this point. I hope to be able to find out where my mojo went to because it seems to have been chopped up like last nights box. Oh well, have a great night (or day depending on when you are reading this).
Paper: Only Orange
Accessories: Wild Wasabi Striped Grosgrain Ribbon (retired)
Tools: Crop-a-dile

Pin It Now!

Tuesday, September 23, 2008

I had help tonight

So I had all of the kids in bed and asleep and headed into the office to do some stamping.  I was working on designing something for my first grader to bring in to her class on Friday.  She is the "Fantastic First Grader" for the week and on Friday's the special person gets to bring in a treat to the class.  If you want to bring in food it has to be store bought.  Since I do not buy store bought goodies for my own kids I am not going to be sending them to school.  So I was working on some little goody bag type of things using a bunch of school supplies that were on clearance at Target.  About 15 minutes later the oven timer was going off and it was time to check the zucchini bread.  I went and took the bread out of the oven and rinsed a few dishes from dinner and threw them in the dishwasher and came back to a surprise in the office.  I was gone for maybe 10 minutes and my 21 month old daughter had woken up and pulled herself up to the desk for some play time of her own.  This is what I came back to.

Hannah

So I was a little upset to see my work now cut up and scribbled on, but I didn't stay mad for very long as she tried to get me to help her with it.  I am just counting my lucky stars that she did not cut herself with the sharp scissors or get marker on her jammies.  I have learned my lesson, even if all the kids are asleep when I leave the room make sure all of my stuff is put away or the door is closed. 

So here is what her creation looks like. 

Hannah's Box

Now I get to go try and get her back to bed.  She has been sitting on my lap enjoying seeing her picture and her box on the computer.

Pin It Now!

Monday, September 22, 2008

I Officially jumped on...

the Frankie Bandwagon.  There are just so many different variations of this cute little guy out there, I couldn't help but cave and make one of my own.  The one that I chose to use was on Dawn's Blog, and she got the idea from someone at convention.  I made my Frankie into a popcorn slider thing.  In the picture I have the bag of microwave popcorn sticking out but it does slide all the way in so you cannot see it when you want to give it away.  I am thinking that they would be good teacher gifts for Halloween!

Frankie

Isn't he just the cutest?  I did make one change to her original and used the round tab punch for the bolts and I just used the paper trimmer to slice off the round part of the tab.

Stamps: Smarty Pants

Ink: Basic Black Ink pad and Marker, Kiwi Kiss

Paper:  Lovely Lilac, Kiwi Kiss, Whisper White, Basic Black, Brushed Silver

Accessories:  Black Grosgrain Ribbon, Stampin Dimensionals, Stamping Sponges, White Gel Pen, Sticky Strip

Punches/ Tools:  1 3/8 inch Circle Punch, 1 inch Circle Punch,  Round Tab Punch, Horizontal Slot Punch

Pin It Now!

Friday, September 19, 2008

Just too tired

Sorry for the lack of post yesterday.  I was working on making some more hair bows for my little girls and I lost track of time.  I did sit down and work on a project but I was literally falling asleep at the computer when I was trying to crop the photos and put my watermark on them. 

This is my take on the Tic Tac holders.  I went to 3 different grocery stores looking for the orange tic tacs that come in the larger size but couldn't find them, and then of course the last store I was at didn't have any tic tacs in the bigger boxes so I settled for some Dentyne Ice mints.  (They are really good mints by the way.)

This is a really easy project that I am sure the ladies who come to my class will love. 

mints closed mints open

Stamps: Batty for You

Ink: Basic Black

Paper:  Kiwi Kiss, Tangerine Tango, Basic Black, Whisper White

Accessories: Dimensionals, Black Grosgrain Ribbon

Tools/ Punches:  Crafters Tool Kit, Scallop Circle Punch, 1 3/8 inch Circle Punch, 1 1/4 Inch Circle Punch, sponges

Pin It Now!

Wednesday, September 17, 2008

Quick Daisy Thanks

I was working a little too fast to get this card done, and although it was quick it took longer than it should have.  This was for a "Punch your way to a 1, 2, 3 card" challenge.                                                                                  

Here are the challenge requirements:

1. You must use only one stamp set

2. Up to but not more than two embellishments

3. Three colors. This includes the card stock & ink   (this includes ALL the SU! colors..... including BASIC BLACK & WHISPER WHITE!)

As a BONUS on this challenge... you can use as many punches as you want... but you have to use at least one.

This sounded hard at first but once I picked out my one stamp set and my 3 colors this card pulled itself together.  I need to remind myself of some basics though when I am tired and in a hurry.  First make sure you pull off the masking tape before you stamp your image on the paper ( for the sentiment I masked off the bottom part of the saying).  I messed this one up not once, twice but 3 times.  I had this lovely "Thank You" with a blurry mess right underneath it where the tape picked up ink and transferred it to the cardstock.  Second thing, when you are paper piercing the base of your card, make sure that it is "open" so you don't punch the inside of your card.  This case it turned out ok since it was a straight line near the bottom but next time it could be a lot worse.  So after these and a few other blunders here is what my card ended up looking like.

daisy thanks

Stamps: Upsy Daisy

Ink: Chocolate Chip, Kiwi Kiss

Paper:  Whisper White, Chocolate Chip, Kiwi Kiss

Accessories:  Earth Element Button, Linen Thread

Tools/ Punches:  Crafters Tool Kit, Word Window Punch, 1 inch circle punch, Designer Label Punch, sponge

Pin It Now!

Tuesday, September 16, 2008

Two projects in one day!

Well today definitely has been a productive day.  Not only did I get time to stamp twice, (a really rare thing with 3 kids 6 and younger), the house is clean, and I figured out my camera problems from earlier.  Apparently my toddler got a hold of the camera and got her fingerprints all over the lens.  It was such an even coverage I didn't realize what was going on.  So with that problem solved my pictures a now a little bit more decent.  I tried to work on Kristina's Color Inspiration #23 earlier today but there were so many colors involved and many of them colors I usually use as small accents I was really struggling, so I put it away and pulled it back out tonight.  Here is her challenge.

091608-colorinspiration

The colors are Bravo Burgundy, Chocolate Chip, Pumpkin Pie, So Saffron and Old Olive, plus either Whisper White or Very Vanilla.  My card sure turned out to be a busy one and the jury is still out on whether I really like it or not.  It might be one of those cards that just grow on me over time.

Color Insp #23

I tried to watercolor the flower with ink pads and an aquapainter on very vanilla cardstock.  I am still trying to get the hang of placing the shadows in just the right places.  Then I was trying to put just the faintest amount of Baja Breeze around the outline of the flower and in one spot I didn't dilute it enough and it was much darker than the rest so I had to darken up the whole thing because I wasn't about to start over.   Because I am taking the picture at night a lot of the details aren't really showing up.  The burgundy layer has the leaves stamped on it and the chocolate chip semi circle has been pierced around the edges, and the main image is up on dimesionals, but hey at least the picture is much clearer.

Stamps:  Give Thanks

Ink: Bravo Burgunday, Basic Brown, Baja Breeze, Pumpkin Pie, Old Olive, Chocolate Chip (markers in) Pumpkin Pie, Old Olive, and So Saffron

Paper: Bravo Burgundy, Chocolate Chip, So Saffron, Pumpkin Pie, Very Vanilla

Accessories: Dimensionals, Felt Fusion Flowers, So Saffron Brad, Old Olive Twill

Tools/ Punches:  Crafter's Tool Kit, Coluzzle

Pin It Now!

Its a Boy

We found out that a neighbor is expecting a little baby boy, so of course right away I felt it my duty to send a little congratulations.  This will be their first kid and she is due shortly after me so it will be fun.  I have been meaning to make one of the cute onesie cards that have been all over the place for quite some time now.  I ended up at Lauren's Blog where she has a tutorial for how to make the card here.  I did one card the way that she showed with the scallop borders but it looked too girly for me so I "had" to make a different one.  I ended up using the 1 1/4 inch circle punch to make the neck and leg holes so that I would be able to use the 1 3/8 inch circle punch to make the seams/ borders.  I am much more pleased with the second one.  I cannot believe that it was so quick and easy to make this card, I am almost kicking myself for waiting so long to make one.  So here are my two cards.

2 onsies

(I feel like I am always apologizing for my pictures, but I really had a hard time with this one, between the contrast between the blue and the white and the shiny brads screwy stuff kept happening and this was the best I could get.)

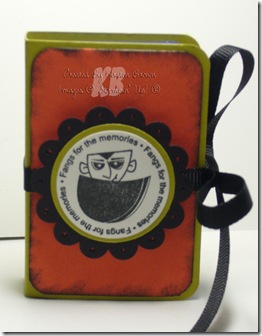
Now I can't just give a card I have to have something to go with it.  Last night when I was transfering some of my notes into my new little "stampin Notes" book (see previous post), I came across a note that said "small kit kats in nugget tin."  Now I do not know where I got it from but the little fun sized kit kat candy bars fit nicely inside the nugget tins, so who ever it was that figured this one out thanks!  (This is why one of my sections of the note book is for listing the ideas with where they came from.)  So here is the gift I will be giving to my neighbor.

kitkat tin

I was able to squeeze 8 kit kats into the tin.  I covered each candy in Blue Bayou DSP which measured 2 3/4 by 4 and tied it with various Wild Wasabi ribbons.  (Before I wrapped the candy in the dsp I took a glue dot to fold in the crimped edges of the wrapper so make it pretty so there weren't all of these orange ends sticking out.)

Stamps: So Many Scallops (retired SAB), Punches Three

Ink: Wild Wasabi, Blue Bayou, White Craft Ink

Paper: Blue Bayou, Whisper White, Wild Wasabi, Blue Bayou Prints Designer Series Paper

Accessories:  Glue dots, Striped Wild Wasabi Grosgrain, Double Stitched Wild Wasabi and Blue Bayou Grosgrain, Brads, Nugget Tin

Tools/ Punches:  Crafter's Tool Kit, 1 1/4 inch circle punch, 1 3/8 inch circle punch, scallop circle punch

Pin It Now!

Monday, September 15, 2008

Simple Bind it All Book

I was cleaning out one of the drawers in our office and I came across a rather large stack of 3x5 cards.  I don't know why we have so many of them so I decided to put them to good use.  I remembered seeing an address book a long time ago on Beate's Blog made with the Bind it All and 3 x5 cards, so I went to work.  I have so many sketches and ideas written down on scrap pieces of paper, backs of envelopes etc that I knew I wanted to make a way to organize it.  Here is what I came up with.

BIA Book

I used some of the chipboard that comes with our designer series paper to make the covers.  They measure 3.5 x 5.25.  I actually cut out 6 pieces this size and glued 3 together each for the front and back covers to make sure that it was really durable.  I covered it using the retired Rebecca Designer series paper.  This stuff is so old that it is single sided.  As you can see I had a mishap with it already.  As I was putting my bind it all away, I knocked the notebook off the table onto the floor and stepped on it, so my binding is not so pretty anymore.  My 3 sections for now are Sketches, Tutorials and Ideas on specific websites and misc for everything else. 

Stamps:  Defining Alphabet

Ink: Close to Cocoa (sponged on edges), Cameo Coral

Paper:  Whisper white, Close to Cocoa, Chocolate Chip and Cameo Coral

Tools/ Punches:  Bind it All, Round Tab Punch

Pin It Now!

Saturday, September 13, 2008

Masculine Birthday Gifts

Lately I have needed lots of masculine and boy cards and gifts, I guess it is that time of year again, and of course everything thing I have is girly.  So here is a quick gift ensemble that I made for my husband's employee.  I was short on time since my husband called at lunch and wanted me to make and drop something by for his birthday that afternoon, with all of the other stuff I had in my packed day.  So here is what I came up with on the spot in a few minutes. 

Masc Bday

The box in a bag is filled with candies.  I was actually surprised because it held a LOT of candy.  The card is a case of a card that I received from Dannie Graves.  All I did was add a different sentiment to change it to a birthday card.  The paper is more from my massive retired DSP collections that I am slowly making a dent in.    The pattern I used for the bag in a box was by Paula and can be found here.   

Have a great weekend! 

Stamps:  Think Happy Thoughts

Ink: Brilliant Blue

Paper:  Pumpkin Pie, Brilliant Blue, Whisper White, Jersey Shore Designer Series Paper

Accessories: Dimensionals, Brads (Bold Brights and Earth Elements), Pumpkin Pie Striped Grosgrain

Tools/ Punches:  Small Star Punch, 1 3/8 inch Circle punch, Scallop Circle Punch, Scallop Edge Punch, Round Tab Punch, Crafters Tool Kit

Pin It Now!

Friday, September 12, 2008

Circle Punch Scallops Tutorial


I have received many emails and comments on how to get your circle punch to make a scalloped border on my last post, so I decided to try my hand at my first tutorial.  The secret is that the patterend paper is not cut but the Not Quite Navy is. 

So here goes.....

1

Supplies:  Circle Punch (any size, here I used the 3/4 inch circle) , Ruler and cardstock or paper that will be "peeking out of the bottom of the scallops"

2

Draw a line that will help you line up your punches.  For the 3/4 inch punch I draw my line at 1/4 inch.  Generally I like to do about 1/3 of the size of the punch to make my scallops.  I usually draw in pencil and erase it, but it will be on the back of your card so it won't show anyway.

3

Eyeball it and line your punch up in the center of the cardstock.  (This way your scallops will be roughly the same on both the left and right sides, if you want to be exact you can always mark the center where you want to start punching.)  It is hard to see from this picture but you want to line the top of the punch up with the line that you drew.

4

This is what your first punch will look like.

5

Then you just keep punching on both sides lining your punch up with the cut next to it and the guideline on the top.

6

Cut your cardstock to the size you want and attach it to your card!  Easy Peasy Mac and Cheesy.

I discovered this while looking through some scraps of paper and I had a sheet of paper that had circles in a row that kept getting caught up on the other sheets in the folder.  So I ripeed the top half of the circles off and was left with something that looked like scallops when I put it back with the other papers in the folder.   I hope that this was helpful, if you have any other questions about it, just let me know.  Also if there is anything else I have done that you would like to see pictures of how to do it, just let me know.  I will either direct you to where I got it from ( I am all about giving credit where it is due) or make another tutorial for you!

Pin It Now!

Thursday, September 11, 2008

Scandinavian Christmas in Maine

Boy what a crazy busy day today has been and I still have so much to get done so this will be a quickie.  I seem to associate a lot of my childhood "Swedish" memories with blues and reds.  I don't know if those were just my grandparents personal likes or if they are really the prevelant in the culture.  I knew that I wanted to use the colors in the Maine Blueberry paper with this set.

scand tree

The red flower is cut out and mounted on dimensionals. The scallop edge is actually done with the 3/4 inch circle punch becuase I wanted bigger scallops than the scallop edge punch provides.  This was a really simple and quick card. 

Stamps: Scandinavian Season

Ink: Not Quite Navy, Old Olive, Riding Hood Red

Paper:  Bashful Blue, Not Quite Navy, Old Olive, Whisper White, Maine Blueberry DSP

Accessories: Earth Elements Brads, Wide Old Olive Grosgrain Ribbon

Tools/ Punches:  3/4 Inch Circle Punch, Stampin Sponge

Pin It Now!

Wednesday, September 10, 2008

Upsy Daisy

I think that this has to be my favorite stamp set out of the current catalog.  Daisies have always been my favorite flower, I just love em.  In fact my bouquet at my wedding was made from daisies.  I also happen to really like the whole silhouette line that SU! has.  And then who can pass up a stamp that is 15% off? 

I knew that when I saw Kristina's Color Inspiration #22 that the Upsy Daisy stamp set would be perfect. 

090808-color
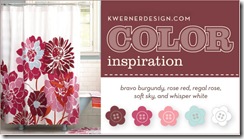
The colors she inspired us with are Bravo Burgundy, Rose Red, Regal Rose, Soft Sky and Whisper White.

I still had a mess all over my stamping table because I had not cleaned up from stamping last night.  On top were my pastels.  Before last night my poor pastels had been neglected for quite some time.  I decided to give them a try on this card.  I also found a simple sketch in my notes that I think came from a SCS sketch challenge but I didn't write down the number and while I was trying to figure out which one it was we had a little power outage and I haven't made it back over there yet.  Well here is what I came up with.

upsy thoughts

As I was saying earlier, my table was a mess and I had out some Baja Breeze from last night on the table and when I was pulling out the cardstock colors they all got mixed up and I wasn't paying attention and ended up using Baja instead of Soft Sky.  Oops!  The first time I tried to do the poppin pastels technique on the daisies I didn't like the way that the stems were turning out, so I turned my paper over and started again, but this time I inked the stamp up first in Versamark and then colored the stems with a garden green marker and I really like the way that it turned out this time.  The flowers are a combination of the burgundy, and two roses.  The main image is mounted on dimensionals to give it a little something extra since it is such a simple card.  In real life there is more a of a contrast between the regal rose ribbon and the rose red layer underneath.  I hope you enjoy!

Stamps:  Upsy Daisy stamp set

Ink: Versamark, Bravo Burgundy, Green Galore marker

Paper: Baja Breeze, Whisper White, Rose Red, Bravo Burgundy

Accessories: Regal Rose wide grosgrain ribbon, Stampin Pastels, Sponge daubbers, stampin dimensionals

Pin It Now!

Tuesday, September 9, 2008

I am alive, blog candy winner, and new stamps too!

Sorry for falling off the face of the earth this past week.  I got sick and life has been a mess.  But all is well now and even better now that my stamps finally arrived today!  Yes I finally made that first order on my birthday from the new catalog and after having the delivery a day late I finally have a few new goodies! 

Lets get the first things out of the way, I have some blog candy to give away.  I thought it was funny that most of you chose to email me once I added that option in there instead of posting as a comment.  I am sorry to the one person that posted a comment, I couldn't add you in because I don't know who you are, you signed as anonymous.  So I cut up the 11 names of people who emailed me and Kaitlyn drew out........Ellen!  So Ellen please email me your address so I can get your tag kit out to you asap!

When I saw the new mini catalog, I fell in love.  There are so many wonderful stamp sets in there, but the first one that I was drawn to was the Scandinavian Season stamp set.  It really brought me back to my trip to Sweden and many Christmases (and well year round) at Mormor's (grandmother in Swedish) house.  It also made me think of my favorite Carl Larsson paintings.  Well the stamp set is not his style of painting but I could see so many options using his color pallet of sort of muted colors (I don't know if that is the right word to describe it but it is all I can think of right now) with the bright red.  Here is my favorite Carl Larsson painting.

Ok so enough of my reminiscing and on to the card stuff.  I took the red and the blue from the painting for my card an here is what I came up with.

scand season

I wanted to give the card some texture to it so I used 3 out of the 4 stamps in the set on one 3x3 card.  The images on the white paper are the snowflake while the image on the Baja Breeze is the tree.  The mittens are stamped in Riding Hood Red, cut and mounted on dimensionals.  I toyed with the idea of using a brad to "hang" the mittens on but decided not to since we don't have any in color brads.  I hope you enjoy, I am off to play some more with my new toys.

Stamps: Scandinavian Season

Ink: Baja Breeze, Riding Hood Red

Paper: Whisper White, Baja Breeze

Accessories:  Stampin Dimensionals, Riding Hood Red Taffeta Ribbon, Linen Thread

Pin It Now!

Tuesday, September 2, 2008

Birthday Blog Candy (A bit late)

but better late than never right? I had a wonderful relaxing weekend away from home for the long weekend. I had typed up this post with the hopes of having it auto post while I was gone but didn't have any luck. I had tried it out last week and I guess that blogger is not set up for that type of stuff and I had to post it manually. So I saved it to a thumb drive and of course left it in the computer so I couldn't post from a different computer while I was away. I am still getting the hang of this whole blogging thing and still have some more learning to do. I now realize that I could have typed it as a draft and avoided all of the problems, so I know that for next time. It is always crazy trying to catch up after being gone even for such a short time.

The card for today is a case from Andrea Walford's blog. All I did was change the flower stamp that was used (because I didn't have that one) and changed the half back pearls to green dew drops. It is just a pretty card I couldn't help but post it here. I hope you enjoy it too.

both way du jour

Stamps: Both Way Blossoms, Dreams du Jour

Ink: Basic Black, Riding Hood Red, Kiwi Kiss

Paper: Pink Pirouette, Riding Hood Red, Bella Rose DSP

Accessories: Dew Drops (non SU!, aggh can you believe it?!?)

Tools/ Punches:

NOW FOR THE BLOG CANDY!

I usually spend some time during Labor Day weekend getting a big jump start on my Christmas shopping. So for you I have some Christmas Candy! It is the Holiday Tag Bundle that Stampin' Up! offered as a special last year.

P1010604

It includes

30 piieces Whisper White cardstock (2 x 41/4)

15 Pieces of Real Red textured cardstock (3 1/4 x 4 1/4)

15 pieces of Soft Sky Prints Designer Series paper (dotted diamond) (3 x 4 1/4)

15 pieces of Real Red zigzag twill tape (3 1/2 inches)

All you have to do is leave a note on this post or send me an email, if you want you can tell me your favorite DSP out of the new catalog but it is not mandatory. I will pick the winner on Friday, so make sure you get a comment in by Thursday at midnight!

Pin It Now!